


Installing a new operating system can feel overwhelming, especially when it involves something as important as your computer. But the truth is, once you understand the process, installing Windows 12 using an ISO file is surprisingly straightforward.
Whether you are upgrading from an older version of Windows or setting up a fresh system, this guide walks you through everything in a clear and practical way. No complicated jargon. No unnecessary steps. Just a clean, reliable method that works.
What is a Windows 12 ISO File

Before jumping into the installation process, it helps to understand what an ISO file actually is.
An ISO file is essentially a complete copy of the Windows 12 installation disk stored in a single file. Instead of using a physical DVD, you use this file to create a bootable USB or install Windows directly.
Think of it as a digital installer that contains all the files needed to set up Windows on your computer.
System Requirements for Windows 12
Before installing Windows 12, make sure your system meets the basic requirements. While official specifications may vary, most modern systems should include:
Processor: 64 bit CPU with at least 1 GHz speed
RAM: Minimum 4 GB, recommended 8 GB or more
Storage: At least 64 GB free space
TPM: Trusted Platform Module version 2.0
Graphics: DirectX 12 compatible GPU
If your system already runs Windows 11 smoothly, there is a good chance it can handle Windows 12 as well.
Things to Do Before Installation
Skipping preparation is one of the most common mistakes people make. A few minutes of planning can save hours of frustration later.
Backup Your Data
Always back up important files like documents, photos, and videos. A clean installation will erase everything on your system drive.
Check Product Key
Make sure you have your Windows license key ready. If your system is already activated, it may automatically activate again.
Stable Internet Connection
While not always required, having internet access helps download updates and drivers during installation.
Download Windows 12 ISO File
To begin, you need the official Windows 12 ISO file.
- Visit the official Microsoft website
- Navigate to the Windows 12 download section
- Select the correct edition and language
- Download the ISO file
Always avoid third party websites. Unofficial ISO files can contain malware or modified system files.
Create a Bootable USB Drive
Once you have the ISO file, the next step is to create a bootable USB drive.
What You Need
USB drive with at least 8 GB storage
A tool like Rufus or Windows Media Creation Tool
Steps Using Rufus
- Insert your USB drive
- Open Rufus
- Select your USB device
- Choose the Windows 12 ISO file
- Click Start
The process may take a few minutes. Once done, your USB is ready to install Windows.
Boot from USB Drive
Now comes the actual installation part.
- Restart your computer
- Enter BIOS or boot menu by pressing keys like F2 F12 or DEL
- Select the USB drive as the boot device
- Save and exit
Your system will now start from the USB and launch the Windows setup screen.
Windows 12 Installation Process
Once the setup begins, follow these steps carefully.
Step 1 Select Language and Region
Choose your preferred language, time format, and keyboard layout. Click Next.
Step 2 Click Install Now
You will see the Install Now button. Click it to continue.
Step 3 Enter Product Key
Enter your product key if prompted. You can also skip and activate later.
Step 4 Choose Edition
Select the Windows 12 edition that matches your license.
Step 5 Accept License Terms
Check the box and click Next.
Choose Installation Type
You will see two options:
Upgrade
Custom Installation
Upgrade
Keeps your files and apps. Useful when upgrading from a previous Windows version.
Custom Installation
This is a clean install. It deletes existing data and installs a fresh copy of Windows.
For best performance, most users prefer the custom installation.
Partition and Drive Selection
Here is where many people get confused, but it is simpler than it looks.
- Select the drive where you want to install Windows
- Delete old partitions if doing a clean install
- Create a new partition
- Click Next
Windows will automatically create necessary system partitions.
Installation Progress
After selecting the drive, the installation begins.
Your computer will:
Copy files
Install features
Install updates
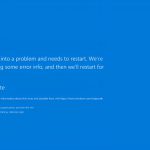
Restart multiple times
Do not turn off your system during this stage.
Initial Setup After Installation
Once Windows 12 is installed, you will go through the setup process.
Region and Keyboard
Confirm your settings again.
Network Connection
Connect to WiFi or Ethernet.
Microsoft Account
Sign in with your Microsoft account or create a local account.
Privacy Settings
Choose your preferences for data sharing and tracking.
Take a moment here and read each option. Many users rush through this and later wish they had adjusted these settings.
Install Drivers and Updates
After reaching the desktop, your system may not be fully optimized yet.
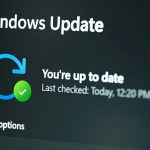
Windows Update
Go to Settings and check for updates. Install everything available.
Device Drivers
Most drivers install automatically, but you can download specific drivers from your manufacturer website for better performance.
Common Issues and Fixes
Even with a clear guide, small issues can come up. Here are some common ones.
USB Not Booting
Check BIOS settings and make sure USB boot is enabled.
Missing Drivers
Download drivers manually from your device manufacturer.
Activation Issues
Make sure you are using the correct edition and valid product key.
Clean Install vs Upgrade Which is Better
If you are unsure which method to choose, here is a simple way to decide.
Upgrade is quicker and keeps your files, but may carry old system issues.
Clean install takes more time but gives you a fresh start with better performance.
If your system feels slow or cluttered, a clean install is usually worth it.
Tips for a Smooth Installation
Use a fast USB drive for quicker setup
Keep your laptop plugged in during installation
Disconnect unnecessary external devices
Double check your selected drive before formatting
These small steps reduce the chances of errors and make the process smoother.
Is Windows 12 ISO Installation Safe
Yes, installing Windows 12 Iso Download using an official ISO file is completely safe as long as you follow the correct steps.
The key is to always download files from trusted sources and avoid modified versions.
Final Thoughts
Installing Windows 12 from an ISO file might seem technical at first, but once you break it down, it is just a series of simple steps. Many users find that doing it themselves not only saves time but also gives them better control over their system.
If this is your first time, take it slow and follow each step carefully. After completing it once, the process becomes much easier the next time.
A fresh Windows installation often feels like a brand new computer. Faster performance, fewer issues, and a clean environment to work in.