


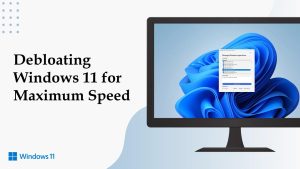
Windows 11 looks modern and polished, but under the surface, it often carries unnecessary apps and background processes that slow things down. If your system feels sluggish even with decent hardware, the issue might not be your PC. It is often the extra software that comes preinstalled.
This is where debloating comes in. Debloating Windows 11 means removing unwanted apps, disabling unnecessary services, and cleaning up the system so it runs faster and smoother. It is not about hacking your system or doing anything risky. It is about taking control of what actually runs on your machine.
In this guide, you will learn how to safely debloat Windows 11, improve performance, and get a cleaner experience without breaking important features.
What Is Bloatware in Windows 11
Bloatware refers to apps and services that come preinstalled but are not essential for most users. These can include:
- Preinstalled games and entertainment apps
- Trial software
- Background services you never use
- Manufacturer specific utilities
For example, apps like Xbox Game Bar, Clipchamp, Weather widgets, or third party promotions may run in the background even if you never open them.
While each app may seem harmless, together they consume RAM, CPU power, and storage. Over time, this leads to slower startup times and reduced performance.
Why You Should Debloat Windows 11
Debloating is not just for tech enthusiasts. Even casual users can benefit from it.
Faster Startup Time
Many apps launch automatically when your system boots. Removing them can significantly reduce startup time.
Improved Performance
Less background activity means more resources available for the apps you actually use.
Better Battery Life
On laptops, fewer processes running in the background can extend battery life.
Cleaner User Experience
No unnecessary notifications or apps cluttering your system.
Before You Start: Important Safety Steps
Debloating is safe if done correctly, but it is always smart to prepare.
Create a Restore Point
This allows you to revert your system if something goes wrong.
- Search for Create Restore Point
- Click Create and name it
Backup Important Files
Always keep your important data safe before making system changes.
Avoid Removing Core Services
Not everything that looks unnecessary is safe to remove. Stick to known apps and avoid system level services unless you are sure.
Method 1: Uninstall Preinstalled Apps Manually
This is the easiest way to start debloating.
Steps:
- Open Settings
- Go to Apps
- Click Installed Apps
- Scroll through the list
- Click on apps you do not need and select Uninstall
Common Apps You Can Remove:
- Xbox Console Companion
- Microsoft Teams personal version
- Clipchamp
- News and Weather apps
- Third party preinstalled apps
This simple step alone can free up space and reduce background activity.
Method 2: Disable Startup Programs
Many apps run automatically when you start your PC.
Steps:
- Press Ctrl + Shift + Esc to open Task Manager
- Go to Startup Apps
- Disable apps you do not need at startup
Focus on apps with high startup impact. Disabling them can noticeably speed up boot time.
Method 3: Remove Bloatware Using PowerShell
For deeper cleaning, PowerShell allows you to remove built in apps more efficiently.
Steps:
- Search for PowerShell
- Run as Administrator
Example Commands:
Remove a specific app:
Remove multiple apps:
Be careful with commands. Only remove apps you recognize.
Method 4: Turn Off Background Apps
Even after uninstalling, some apps may still run in the background.
Steps:
- Open Settings
- Go to Apps
- Select Installed Apps
- Click on an app
- Choose Advanced Options
- Set Background App Permissions to Never
This ensures the app does not consume resources when not in use.
Method 5: Disable Unnecessary Services
Windows runs many services in the background. Some are essential, others are optional.
Steps:
- Press Windows + R
- Type services.msc
- Review the list
Services You Can Consider Disabling:
- Xbox services if you do not game
- Print Spooler if you do not use a printer
- Fax service
Set them to Manual instead of Disabled if you are unsure.
Method 6: Remove Widgets and Extra Features
Windows 11 includes widgets and features that may not be useful for everyone.
Disable Widgets:
- Right click on the taskbar
- Open Taskbar Settings
- Turn off Widgets
Disable Chat or Teams:
- Open Taskbar Settings
- Turn off Chat
These small changes reduce background processes.
Method 7: Clean Up Storage and Temporary Files
Debloating also includes removing unnecessary files.
Steps:
- Open Settings
- Go to System
- Click Storage
- Select Temporary Files
- Remove unwanted files
You can also enable Storage Sense to automate cleanup.
Method 8: Adjust Visual Effects for Better Performance
Download Windows 12 Iso includes visual effects that look good but use resources.
Steps:
- Search for Advanced System Settings
- Click Settings under Performance
- Choose Adjust for best performance
Or manually disable effects like animations and shadows.
Method 9: Use Trusted Debloat Tools
If you prefer automation, some tools can simplify the process.
Popular options include:
- Windows Debloater scripts
- Open source optimization tools
Only download from trusted sources and read instructions carefully. Avoid tools that promise extreme speed boosts as they may remove critical components.
What Not to Remove
Not everything should be removed. Avoid deleting:
- Microsoft Store
- Security related services
- Windows Update components
- Core system apps
Removing these can cause system instability or prevent updates.
Real World Impact: What You Can Expect
After debloating, most users notice:
- Faster boot time
- Reduced lag during multitasking
- Lower RAM usage
- Smoother overall experience
The difference is more noticeable on systems with 4GB or 8GB RAM, but even high end PCs benefit from a cleaner setup.
Common Mistakes to Avoid
Removing Too Much
Over debloating can break features like search or notifications.
Using Unknown Scripts
Some scripts remove essential services. Always review what a script does.
Skipping Backups
Always keep a restore option ready.
Is Debloating Windows 11 Safe
Yes, if done carefully. Windows allows you to uninstall apps and manage services for a reason. The key is to make informed choices and avoid aggressive changes.
If you follow the steps in this guide, you can safely improve your system without risk.
Final Thoughts
Windows 11 is powerful, but it is not always optimized out of the box. Taking some time to remove bloatware and fine tune settings can make a noticeable difference in performance.
You do not need advanced technical skills to do this. Start with simple steps like uninstalling unused apps and disabling startup programs. If you want deeper control, move to PowerShell and service management.
Think of debloating as decluttering your workspace. When you remove what you do not need, everything else works better.